We get a lot of different items through our doors at review HQ which is always fun, but sometimes we get something special in which has the potential to be a real game changer. In this case it is the latest release from SXK, the Supbox, a revolutionary device which allows vapers to use regular RTAs or Boro tanks and bridges all in one rather awesome mod!
I was particularly excited to see this as I have very small, girlie hands, and as much as I love the flavour and usability of billet boxes, they are just too big and uncomfortable for me to use. Finally I can get on board with the boro revolution and it is brilliant!
As far as I am aware, this is the first device of its kind. There are a few mods, other than the billet box, which can use boros, but this is the first that lets you use pretty much any tank style you like. This is pretty huge and I am sure it will set a bit of a trend.

Specs
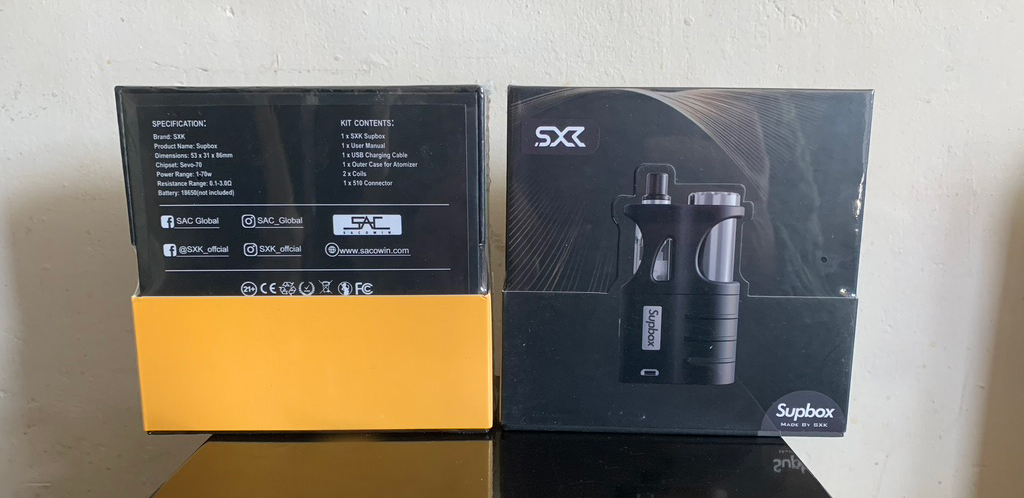
- Dimensions: 53 x 31 x 86mm
- Output Power: 1W - 70W
- Output Voltage: 0.2V - 9.0V
- Resistance Range: 0.25Ω - 3.0Ω
- Input Voltage: 3.0V - 4.2V
- Display: OLED
- Battery: 18650/18350 (not included)
Unboxing
The Supbox is rather understated in its packaging, it comes in a smart but stylish black box with a glossy image of the device on the front, and the specs and contents along with contact details, social media links, warnings and age/safety logos on the back. To show the colour, the box is held together with a slide off sleeve with another glossy image but this time in the colour selected. It is all very smart but it definitely lets the mod do the talking.
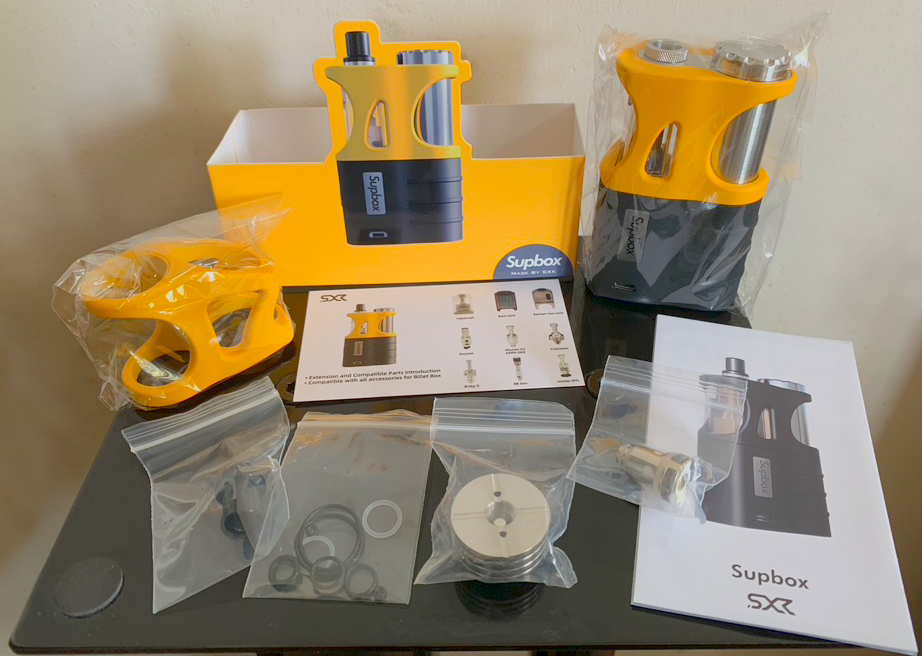
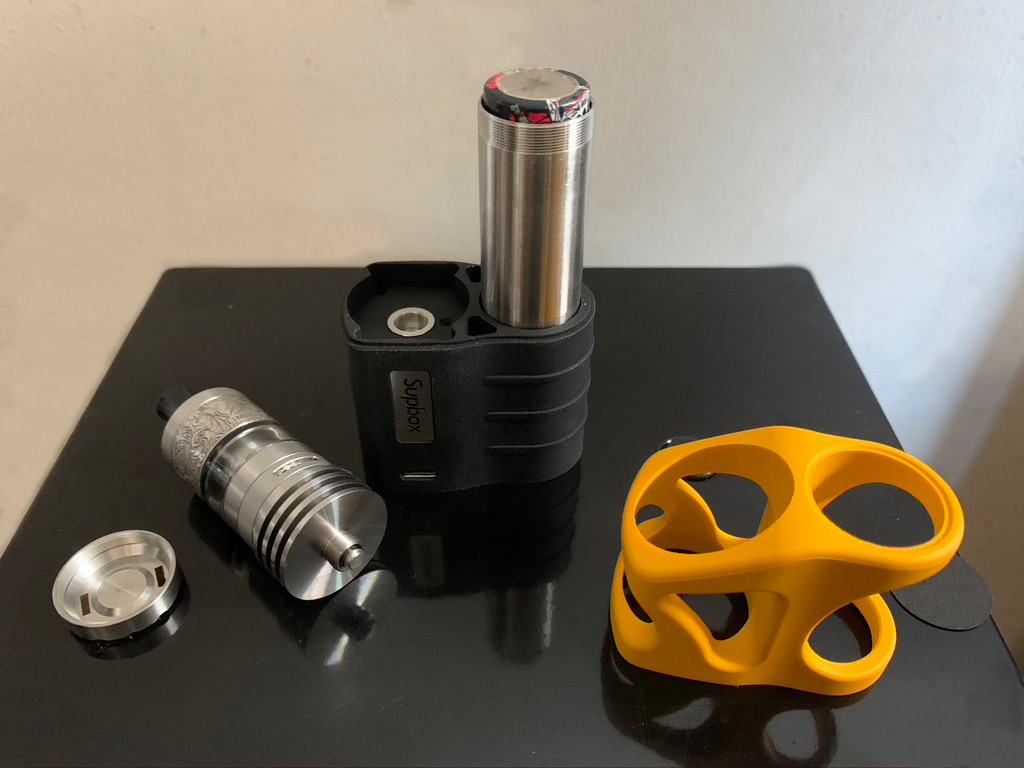
Inside, things get more interesting. Initially you are presented with the Supbox, wrapped in a transparent bag and nestled next to a black box which contains the bag of spares, a drip tip, the rta base extender, the 0.6Ω coil, and the alternative “cage’ for using with the tank of your choice. So you have lots to take in! Finally underneath all that is the instructions for using the Sevo-70 board, and another card which shows all the options for your tank choices and how to use them. Believe me when I say there are so many options!
Basic use
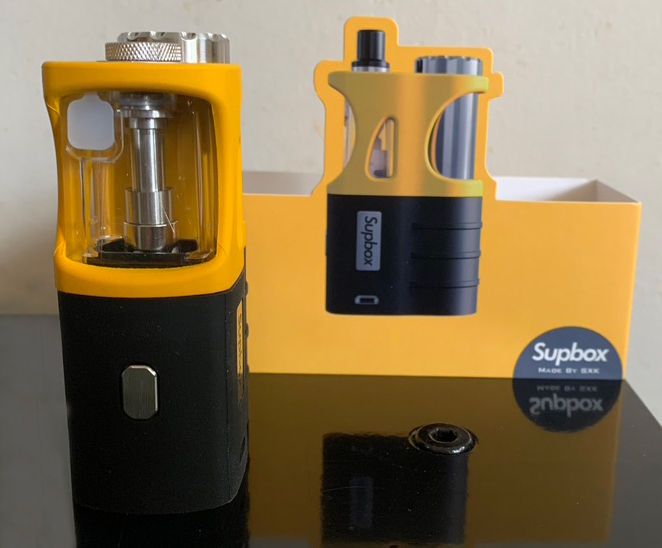
This may take some time as there is so much to cover, SXK are really spoiling us here as I have never used any kit that offers so much choice. I decided to start things simple. When you first take the mod out of the bag, it already has a basic boro style tank installed with a 1.2Ω mesh coil so that seemed a good place to kick things off. Patience has never been my strong point, and I was dying to get started! Filling is easy, there is a white tab in the top corner which simply lifts out and you are all set. So tank filled, it was time to stick in an 18650. This is a side by side device so the battery tube sits next to the tank and it has a smart screw on cap which fixes outside to the cage. It is a lovely looking cap, radiating reflections come out from the centre, but I did find that whilst the threads were initially silky smooth, the tighter it went, the rougher the turning felt. I am sure this will get better with use but it definitely felt a little crunchy. There are no polarity markers but it is pretty obvious which way round the battery goes as the cap has a large contact and inside at the base there is a small nubbly one. So battery in facing down, cap crewed back on and it was all systems go. The chip, by default, doesn’t detect your coil so I had to drop the watts down manually and then I could finally stop admiring the looks and get on with vaping. Both of the provided 1.2Ω and 0.6Ω mesh coils performed really well, great flavour from both and good clouds too. There were no problems with dry hits and coil life seems good. We are spoilt for choice with stock coils at the moment and these are as good as any I have used and will provide an easy option for anyone who doesn’t want to dive in to the deep end straight away.
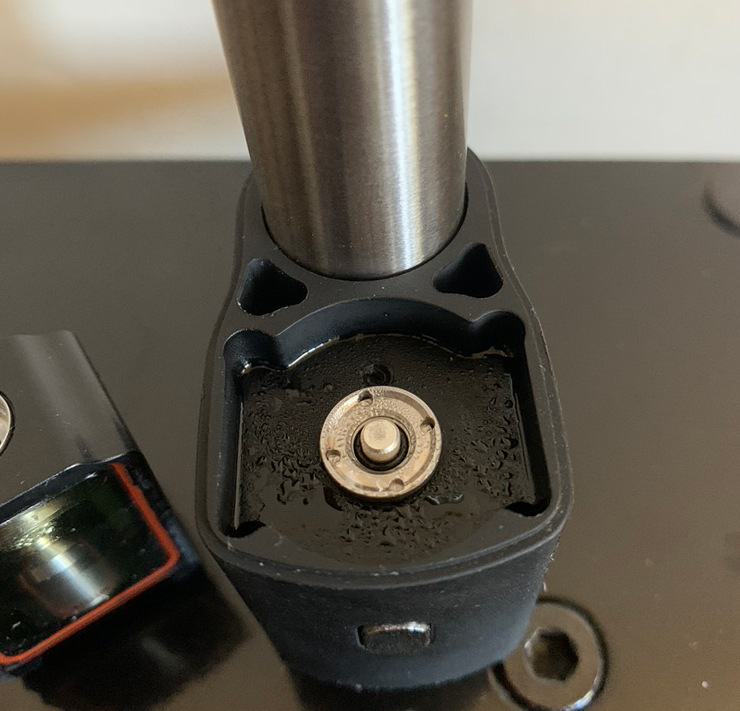
So far so good, so it was time to mix things up a bit and try my own RTA. It is very simple to set up, simply unscrew the battery cap and the drip tip connector to remove the cage and then free the 510! You will see the installed connector has four holes around the edge, I poked a small philips in to one of the holes and gave it a spin and hey presto!
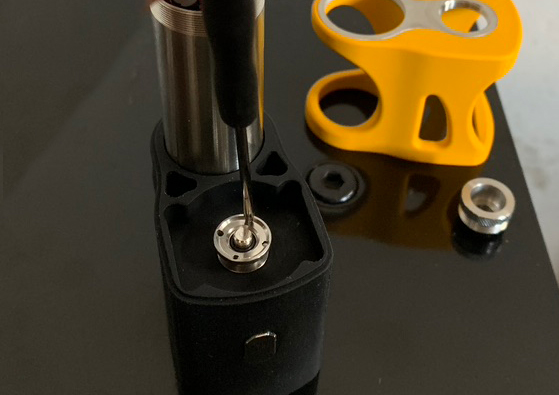
Underneath is the 510 connector ready for you to screw in you favourite tank. All my tanks are TPD compliant so would be a bit short on their own, but thankfully SXK have included a beautiful extender which you screw in first. This is a work of art in itself and reminded me of In’ax genesis tanks with large heatsinks all the way up. This raised my tank up to the perfect height so the drip tip was now above the battery cap. Now you can just have the tank and battery tubes exposed if that is what you like, but I love the tidy look with the cage installed, so before screwing the battery cap on, you have to place the round holed cage over the tank and tube. Then you tighten it all down with the battery cap. It feels very solid and secure and looks great. Wattage adjusted again and back to vaping, everything worked exactly as it should and it felt very balanced and comfortable.
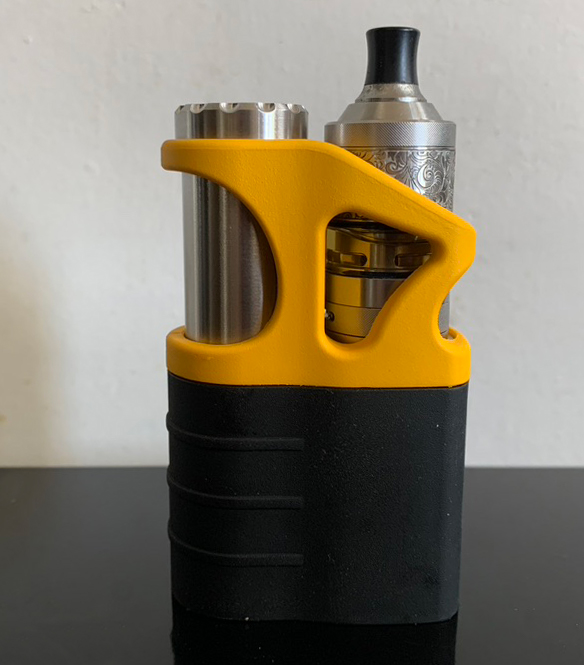
Finally I saved the best to last. As I’ve already said, I just can’t get on with billet boxes, the stretch to the fire button is just too much and the edges dig in, it just isn’t comfortable which I’ve always been gutted about as they open up a whole new world of shiny toys to play with! But now, thanks to the great design of the Supbox, I can finally play with all the wonderful bridges out there! Every tank and bridge designed for the billet box works so there are so many options. But I need to back things up a bit. First things first, I needed to change things over again, so battery cap off, cage removed, tank and extender taken off and the 510 converter needed to be screwed back in. Whilst that sounds like a fair bit of work, it doesn’t take any time at all. I had already built my SXK KRMA and installed it in my SXK Boro tank, I was very keen to try it after all the great things I’d read about the combination, so all I had to do was fill it up, install it in to the rectangle cage, fit that over the battery tube, screw on the battery cap and install the drip tip connector and I could finally try the Supbox in all its full glory. I absolutely love it, it does everything I could ever need a mod to do and then some. This really is a genius idea but better still, the design means the idea also works fabulously!
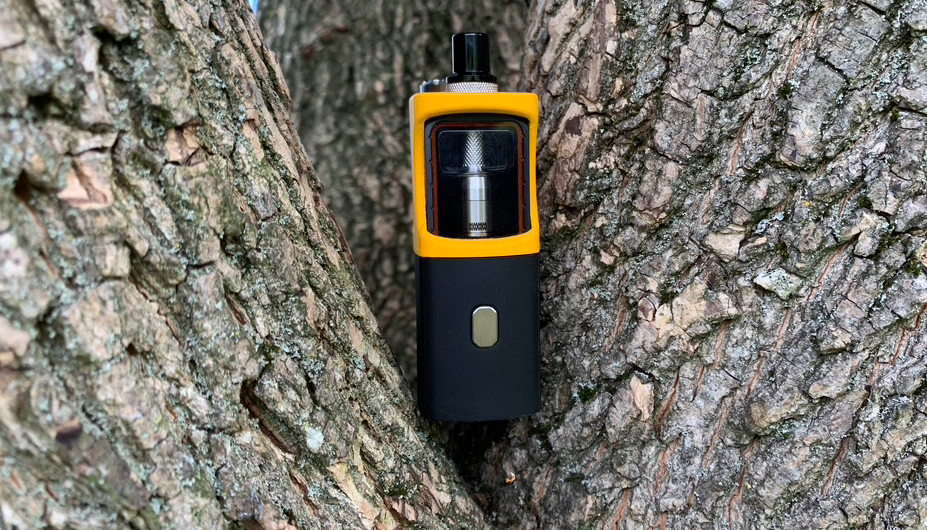
There was a little condensation in the base after I had cleared a tank full and I wiped it out no problem, but I do worry that over time it might cause problems.
Build and feel
The Supbox serves its functional purpose very well, but vaping is also about the tactile, touchy feely side, at least to me, so looks and feel are just as important factors when choosing what mod I will buy. I like curves and don’t like hard edges, big boxes are not for me (damn you small hands!) and comfort is king. I am also very picky (I like to think of it as being discerning, lol!). So how does the Supbox do in this area? Mostly very well, thankfully. The bottom half of the mod is covered in a black, rubberised wrap with both feels good and also helps with gripping it, no soap bar effect here! It is highly resilient to finger prints which is a big bonus as I have quite sweaty hands. The curve of the back is lovely, it really fits nicely and is very comfortable. The rounded grip also means you hand is an a good position to hit the fire button. I found it was best with my middle or ring finger, both were equally comfortable. You might think there would be a ridge between the cage and the main body, but it is all surprisingly smooth.
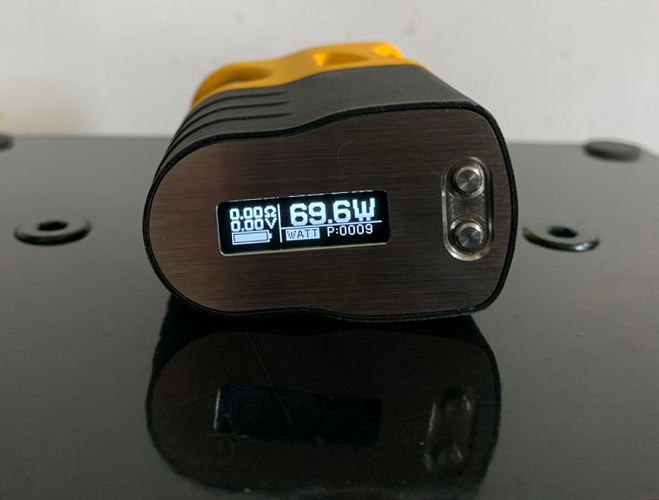
On the base, you will find the screen and the up/down buttons. All of this is nicely recessed so there is no chance of accidentally changing your settings or damaging the display unless you were really super unlucky. The base also has a gorgeous brushed finish which not only looks great, but will also mean that it is not likely to show any scuffs or scratches from putting it down on the side. I tended to rest my little finger on the base to add a bit of stability and to avoid looking like a snob waiving my pinkie in the air, and that was the only part that wasn’t quite as comfortable as my biggest finger joint rested along the bottom corner. It wasn’t bad by any means but I am trying to be as forensic as possible!
There is a usb charging port (but no cable included) which is handy if you get caught with a low battery, but it isn’t really something I use as I always recommend using a dedicated charger. I assume this also doubles as a battery vent should the unexpected happens. At least I assume it serves this double function as there are no other vent holes.
Weight wise, this is a solid device and feels reassuring good without being too heavy. It feels high quality. Even with an rta, it still manages to feel very well balanced and I never worried about it toppling over when I put it down. All in all, it is very impressive, especially in this price range.
Sevo-70 chipset
Now this is an area where I am a massive snob. I like my dicodes mods so the bar is set pretty high, and I must admit I was a little worried about using a proprietary board. There is a Pro version with a DNA board but so far I have been quite surprised by the power and function of this set up. I am usually quite old school so I tend to stick with my regular kanthal 0.9Ω build at around 18-20 Watts and I had no problems at all in Wattage mode. It also consistently read the same as my danibox so it seems very accurate. For temperature control lovers, there is also the now standard options to use SS, TI and NI builds, each with their own default profile. I reluctantly threw together an SS build for testing and it performed exactly as expected and, again, measure the same on both this and my Dani. You can also go in deeper and personalise the profiles for each coil material too if you really like to tinker. There is also Mech mode if that is your thing.
As well as the basic options, there are a few other nice touches. There is a puff counter, which I must admit I am not a huge fan of (I already know that I chain vape!), but you can also set a limit on how many puffs you take. I guess if you are trying to cut down, this could be a handy feature, but I doubt I will be using it any time soon! There is also a Taste Adjustment which is definitely more interesting. In Watts mode, you can select this and then fiddle with the curve to fully customise the vape to your preference. I know other mods have similar features, but it is nice to be able to do this easily on the fly. You can also turn the screen off for ultimate stealth, and you flip the screen if you prefer it one way or the other. It would have been nice to be able to turn the brightness down to save a bit of battery life but seeing as the screen is on the bottom, visually it really doesn’t make any difference.
As you would expect, there are all the usual safety features such as high temperature and short circuit protections. There is also a power lock by pressing the up and down buttons together. One of my pet hates is mods which don’t have this basic feature, so I was very pleased to see it there.
I have heard some people say the battery usage isn’t as efficient as it is with DNA boards but I can comfortably get a full day of fairly heavy vaping out of one 18650 so I don’t really see any issue. I wonder how much of that comes from DNA fanboys, but without test equipment, I can’t explore this theory. Needless to say, it was perfectly good enough for my daily use.
The chipset is very easy to navigate and use, my only niggle is the buttons themselves. To access the menu, you have to press the fire button three times and if often takes me a few goes to get the timing right. The up and down buttons are nicely set back but they are also quite small and I found it was easier to use my fingernails to operate them. If you have fat fingers or short nails, you might struggle. Seeing as my fingers are tiny, this is definitely something to bear in mind.
Customisation
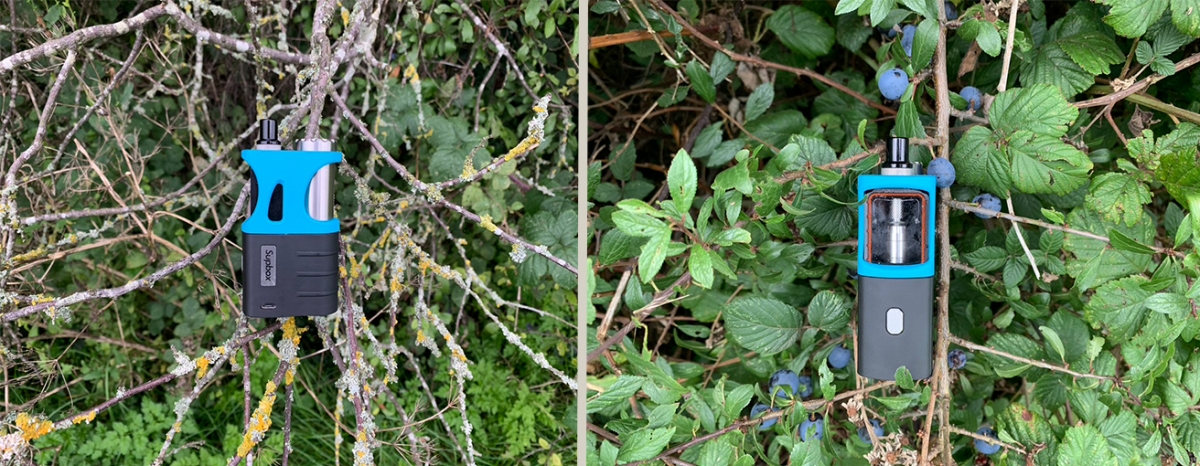
Another awesome feature of the Supbox is just how much you can personalise and accessorise your mod. I got the yellow option, which is a lovely, vibrant shade, but I was also sent a blue set of cages. The finish of these are all really good, they are smooth and there are no bubbles or burrs. You can buy the full kit in either yellow or black, but you can also pick up spare red, orange or blue cages. Mix that up with all the variants of the Boro tank, and you have near infinite choices. There will also be various battery tubes too so you can take your designs even further. I can’t wait until these are release as they all look amazing, personally I’m a sucker for a bit of carbon fibre so they will definitely be on my want list when they are released! I would also like to see some custom battery caps too but I don’t know if there are any plans for these.
The included driptip is very bland and basic, but is very comfortable to use. But if you already have a favourite tip, that is no problem as it is a standard 510 fitment and all the tips I tried fitted well.
If you really want to stealth things up, you can also get rid of the cage altogether and drop in an 18350 which makes this a very sneaky, compact mod. With this and the screen off, this might just be the perfect ninja stealth vaping set up!
Pros
- Great build quality
- Highly customisable
- Very comfortable
- So many options with Boro and rtas
- Easy to set up and use
- Feels solid and durable
Cons
- Scratchy battery cap threading
- Small up\down buttons
- Slightly hard bottom edge
Final Thoughts
I love this kit. Yes there are a couple of niggles, but they are just that and certainly don’t mar an altogether great experience. The Supbox really is a mod that can do everything, not only that but it does it well and in style. I am very excited to add some custom tubes and I am very tempted to treat myself to the pro DNA kit when that comes out but, to be honest, the Sevo-70 version is a cracking kit and I would highly recommend it to anyone who likes to mix things up. Whilst most review kits end up being draw fillers (yes even the good ones!), this has now become my daily kit and I can’t see that changing anytime soon.
Many thanks to Sacowin for sending this over for review.
Michelle (Purplefowler)
Reviewer at POTVWhen her usual forum closed, Michelle found herself in a brave new world full of excitement that something fresh and new was happening. A few days later she somehow found herself on the moderating team and is still not really sure how that happened. Even stranger, she slowly worked her way up to admin and now helps behind the scenes, liasing with vendors and coordinating social media but she can still be found making smutty comments on the forum. If all that wasn't enough, she also is a proud member of the Potv review team specialising in E-liquid reviews for the discerning vaper.
Join the discussion
Vaporesso GEN SE
Stephen got his grubby little mitts on the new Vaporesso Gen SE kit and this is what he thought
Kumiho Thoth S pod
Antony takes a look at the Kumiho Thoth S pod kit after being impressed with their last offering
NIXER X Jack Rabbit Longfills
We reach the end of the line with the NIXER X Jack Rabbit range, and what a way to go out.....for now!
Lost Vape E Plus RBA
Antony follow up on his Lost Vape Thelema Elite 40 kit review with his thoughts on the E Plus RBA kit

