Hellvape continue their ever popular Dead Rabbit series of RTAs, but this time they’ve teamed up with Vapers Brazil and have taken things down the mesh rebuildable route.
Specifications
- 25mm diameter
- 35mm tall (excluding drip tip and 510)
- 3ml straight glass / 4.5ml bubble glass
- 58 grams
- 810 drip tip
- Mesh rebuildable deck
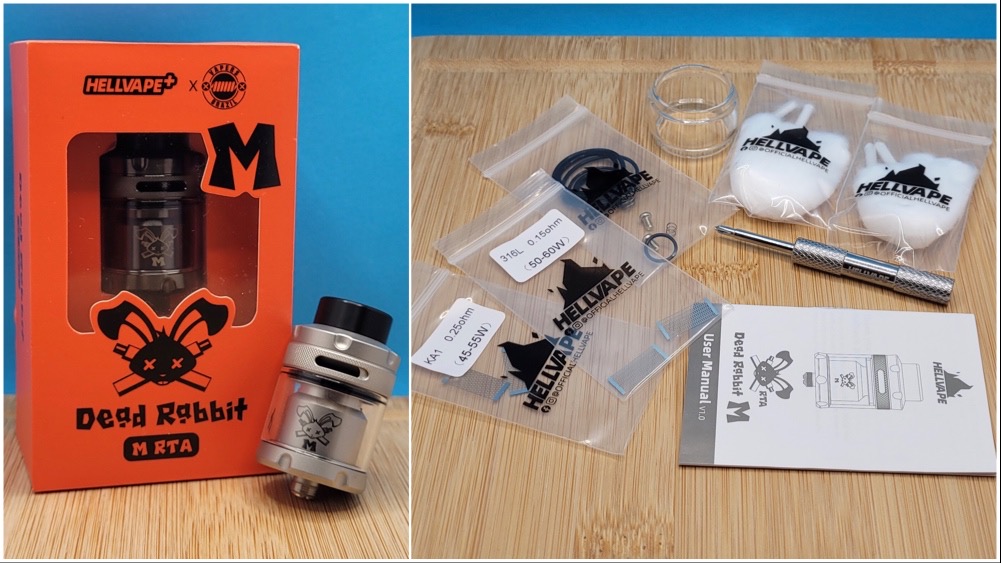
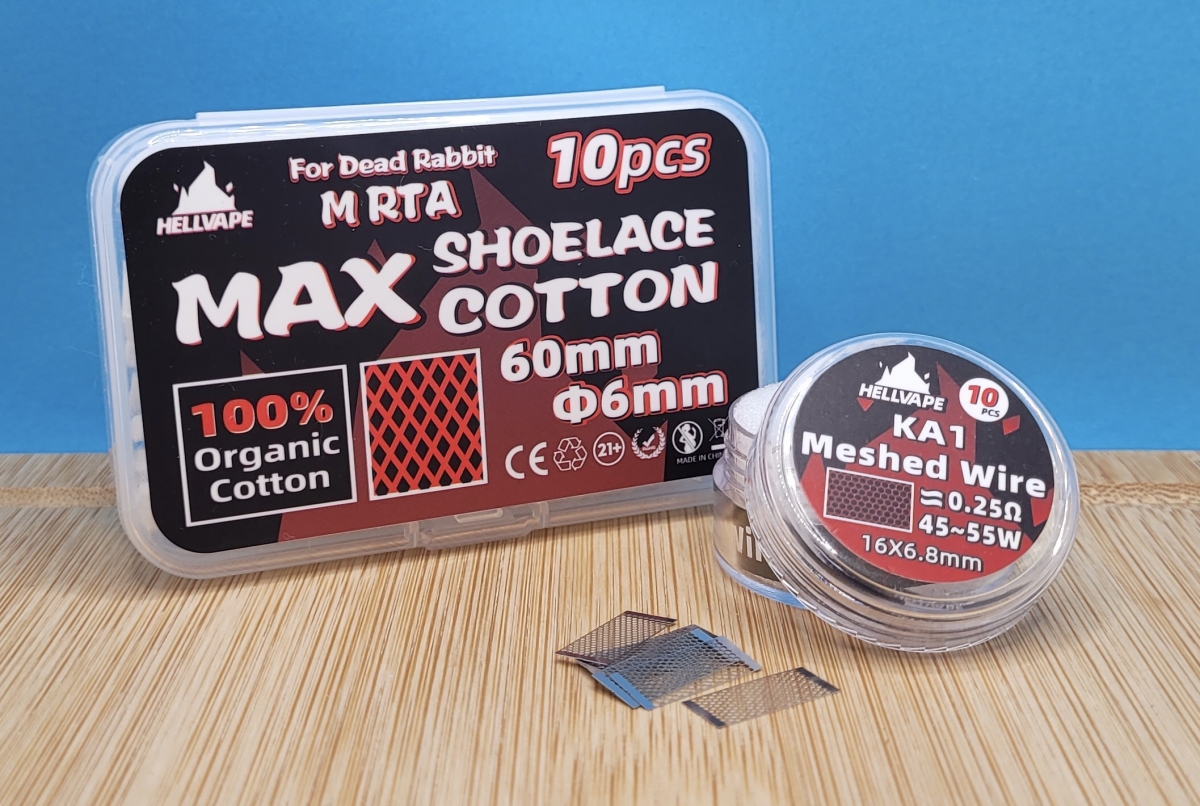
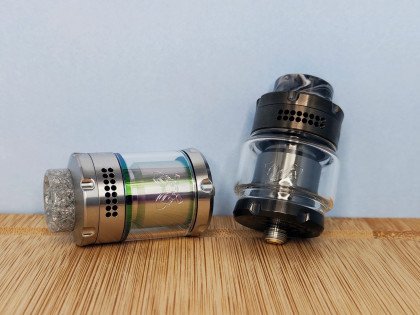
The Dead Rabbit M is available in six colours, and Hellvape sent over the gunmetal and matte stainless steel versions for me to try out, as always the construction seems solid and whilst I’d normally go for the gunmetal version, the finish on the matte stainless steel won me over this time around. The amount of extras packed in the box is quite impressive with all the usual spares etc. you’d normally expect plus four mesh strips (two ss316, two KA1) and a rather beefy coil tool/screwdriver.
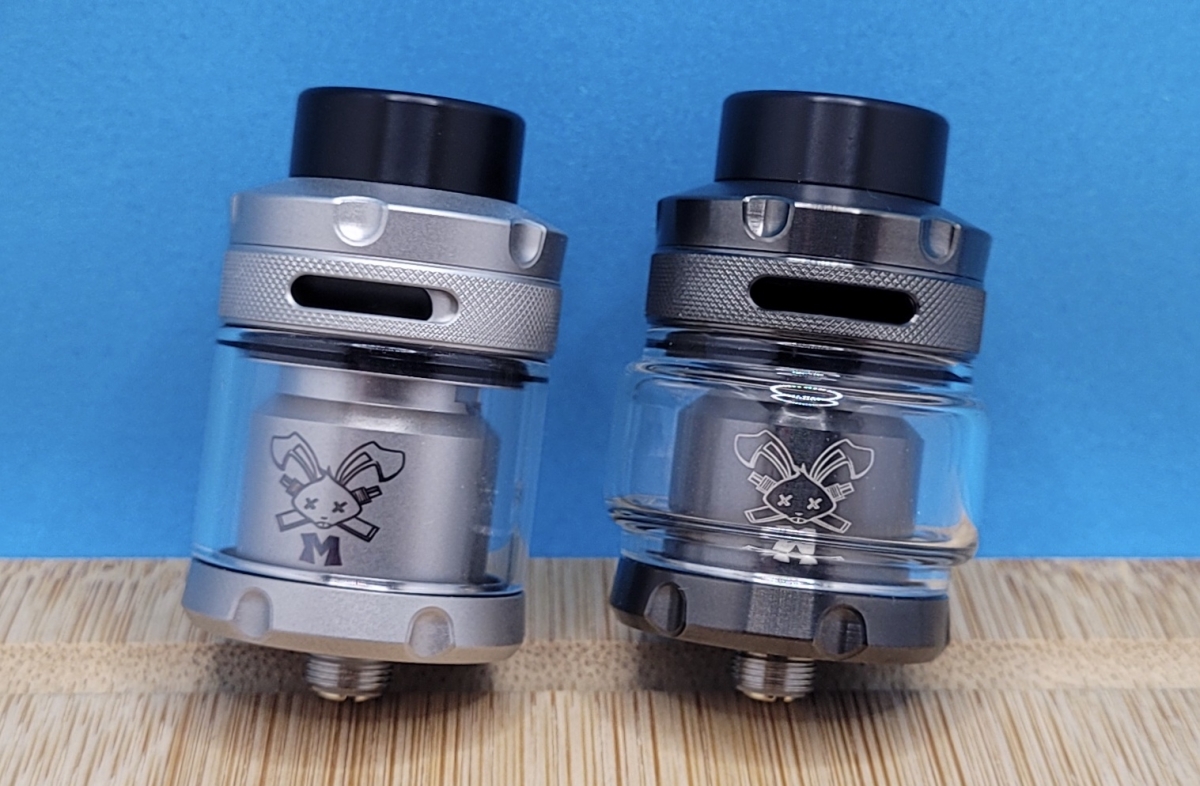
Out of the box, the Dead Rabbit M has a 3ml straight glass installed (2ml for TPD regions) with a 4.5ml bubble glass included. Mesh RTAs have a well deserved reputation for being a bit thirsty so I decided to go with the extra capacity with the bubble glass.
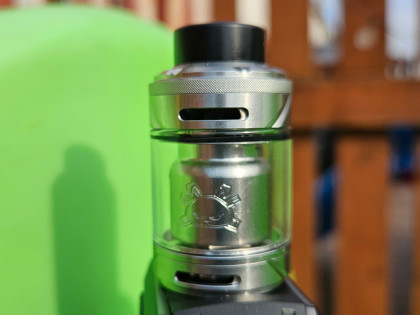
The Dead Rabbit M is 25mm at the base but this flares out to 26.6mm soon afterwards and hits 29.5mm with the bubble glass installed. It uses a top down airflow as with other Dead Rabbit tanks, and it’s actually quite nice looking with lots of little details breaking up the overall design.
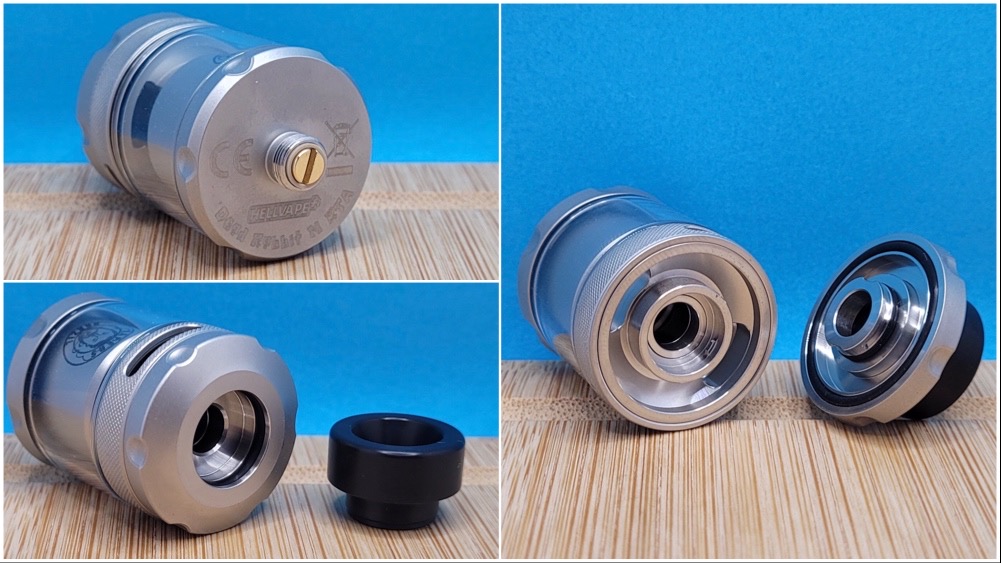
At the base you have a nicely protruding 510 pin, and at the top there’s a standard 810 drip tip. The top cap uses a convenient quarter turn to open bayonet system, and the fill ports are actually a half decent size given the top airflow design so filling has been easy.
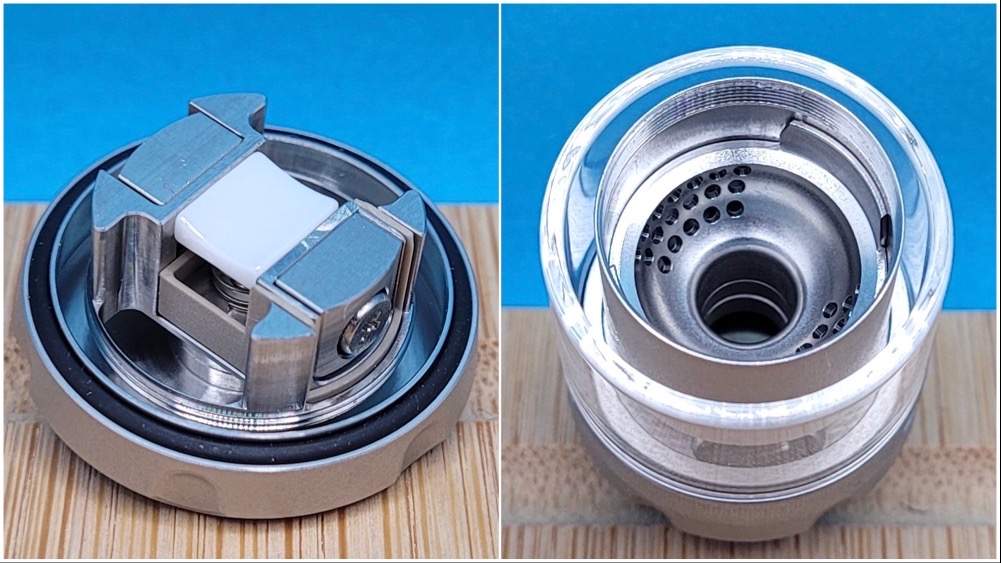
With the base removed, you can see a fairly standard mesh deck design with clamps on either side and a spring loaded ceramic plate under the coil to help keep the cotton in contact with the coil. The clamps are spring loaded so you don’t get a lot of the faff normally associated with building on a mesh deck, just be careful not to unscrew them too far as I’ve already lost one spring by doing this! They’re threaded so when you unscrew the clamp, it moves with the screw so you don’t get a lot of the faff normally associated with building on a mesh deck.
With the chimney section exposed, there’s a domed chamber with honeycomb airflow being directed to the top of the coil, this spins inside the chimney section and those large lugs on either side orientate the airflow into the correct position. There’s a decent 2mm gap between the chamber and the glass as well so I haven’t experienced any issues with bubbles getting trapped on the sides.
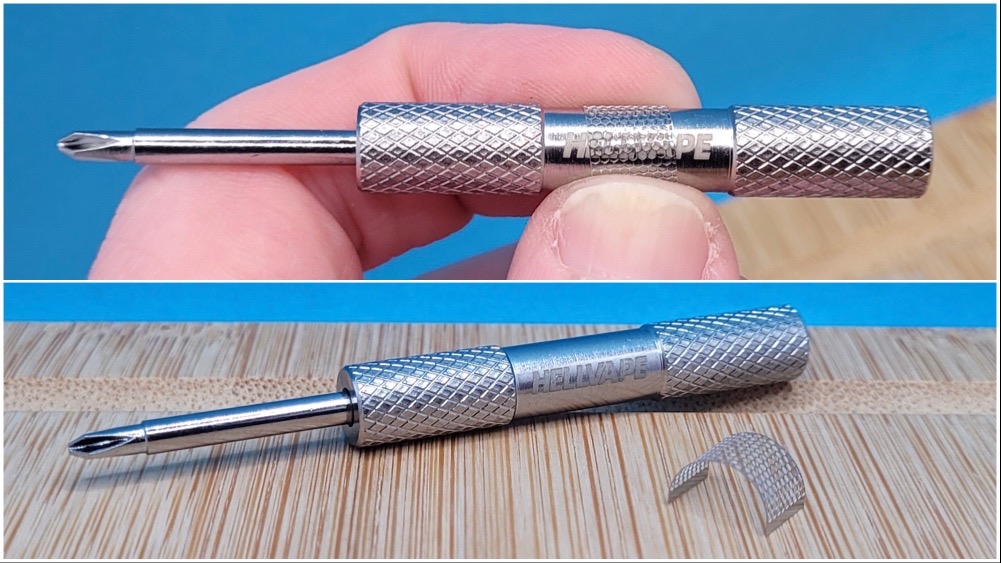
The included screwdriver is reassuringly solid and also doubles as a tool to shape your mesh strips as shown above. Hellvape have been quite generous with two 0.15ohm stainless steel coils and two 0.25ohm kanthal coils included in the box, I went with the kanthal one due to my nickel sensitivity.
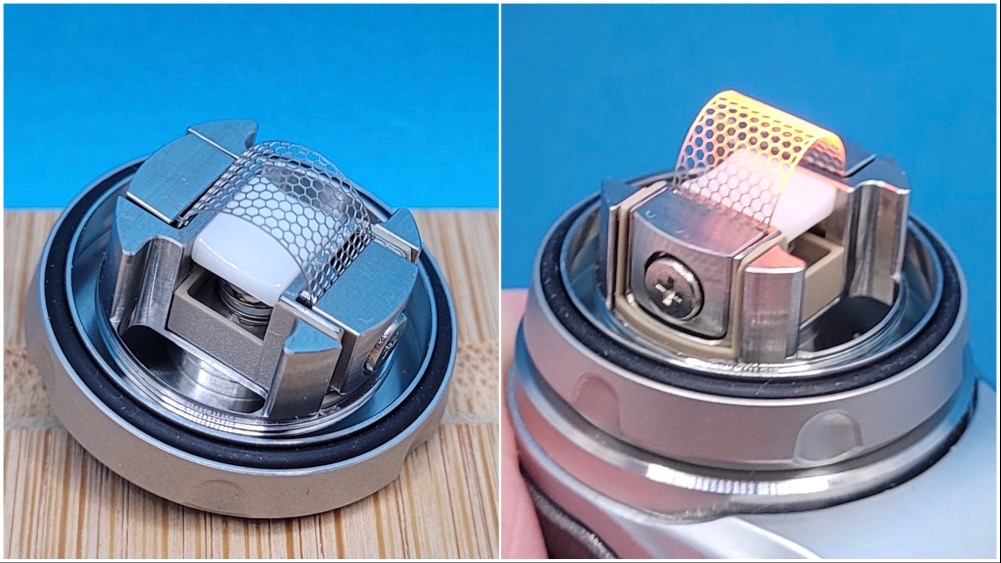
Installing the coil was incredibly easy and Hellvape then advised gently dry burning the coil at about 15 watts to remove any oils or residue from your fingers before wicking.
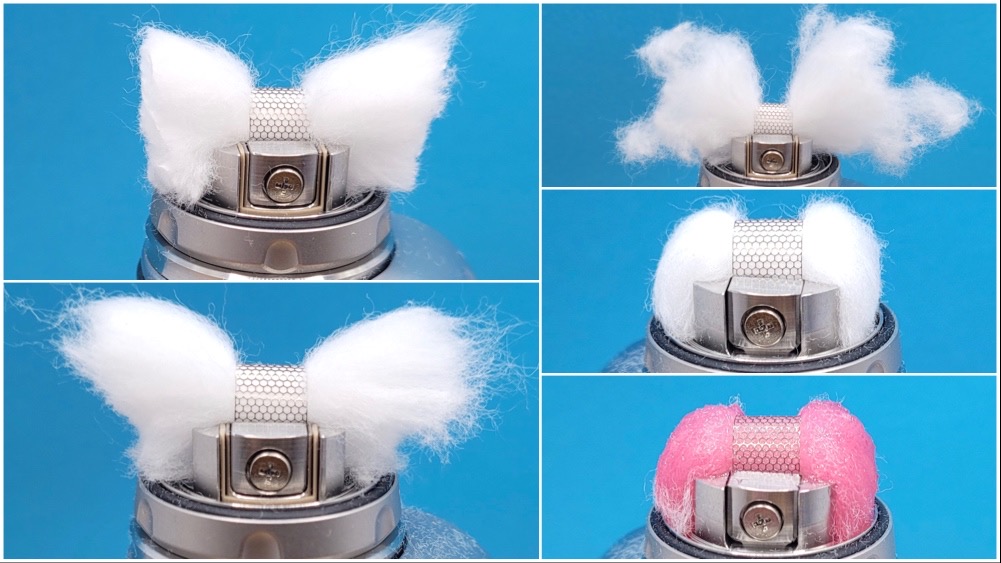
For my first wicking attempt I cut the wicks at the edge of the deck, cut them at 45 degrees and then fluffed the hell out of the ends. This meant that I could now fairly easily tuck the remaining wick into the wicking ports at the base before saturating the cotton. In use it quickly became apparent this wasn’t the best solution….
I had noticed whilst thinning the wicks out that the cotton now felt a little loose under the coil and I could see a distinct pool of e-liquid building up in this area. This would be fine for the first couple of hits whilst things were saturated, but a third hit was out of the question so chain vaping was definitely a no-no!
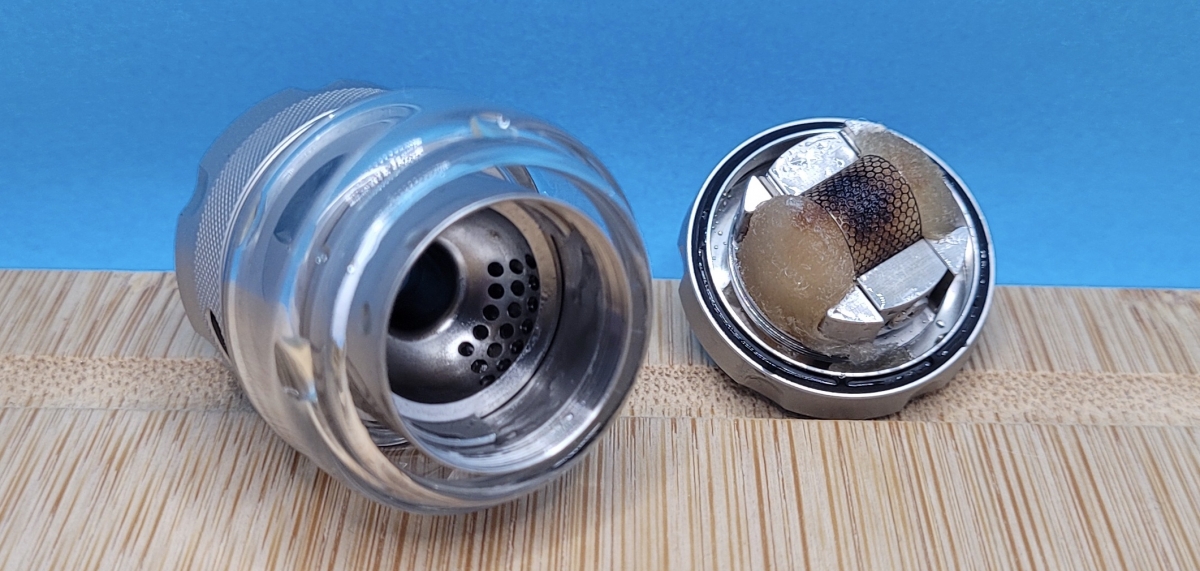
Removing the tank revealed a nicely singed spot on top of the cotton as I feared, back to the drawing board then!
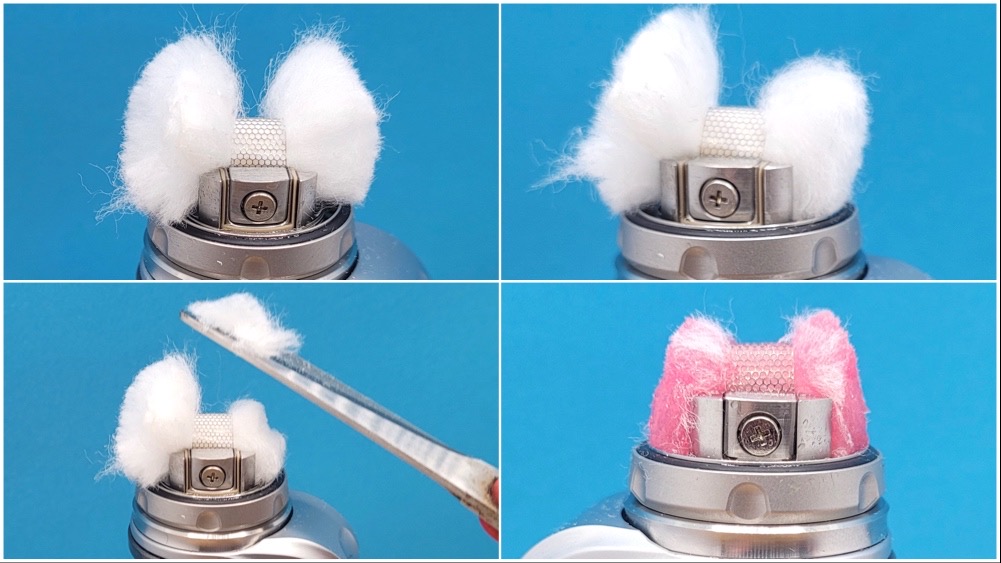
For the second wicking attempt, I went with a more traditional wicking method. This time I didn’t thin the cotton at all as this had obviously left the wick loose under the coil last time, and I simply fluffed the ends out before tucking the wick into the ports below, with this done I then gave the wicks an extreme number zero haircut!
This time I wasn’t getting any burnt hits but I wasn’t getting any flavour either suggesting a lack of wicking. To solve this, I went back in and trimmed some more wick off the sides, when putting the tank back on I noticed this time that there was no resistance when placing the chamber over the wicks. This seemed to do the trick as the flavour was much improved and I was getting bubbles forming after every single puff. With the wicking sorted, I was actually able to push this past the recommended wattage range as well and I found that the flavour was best around 60 to 65 watts with the kanthal coil.
TOP TIP: If you feel ANY resistance between the cotton and vapour chamber when positioning the tank back over the deck, you have TOO MUCH wick!
Pros
- Good construction
- Easy to build
- Smooth airflow
Cons
-
Difficult to wick
Conclusion
If you’re a fan of mesh RTAs or want a well built but inexpensive mesh atomiser to try, then the Dead Rabbit M might be worth a look. On the other hand if you’re not a fan of mesh RTAs, then this will do absolutely nothing to change your mind!
Antony Lord
Reviewer at POTVI was a twenty a day smoker for 25 years and like most smokers I was always going to quit "next week". Having hit my mid forties and having the usual smokers cough and difficulty with anything more than moderate exercise it was obviously time to give up the cancer sticks. I bought my first e-cigarette in 2013 when they were expensive, difficult to find and quite frankly... crap. I used it for about a week then went back to the roll ups, mark up another failed quit attempt. The fact that I had just changed jobs and was under quite a lot of stress probably didn't help. Move on to 2016 and whilst I was browsing eBay I noticed that one of the suggested items that would occasionally pop up was for a cheap e-cigarette. It looked similar to the one I'd bought 3 years earlier but it was only £5 (about 8 times cheaper than before) so I decided to give it another go on a whim. Once the kit arrived I managed to gradually replace the cigarettes with my new kit over a two month period and got into watching YouTube reviews for newer kit. My cheap and cheerful kit was replaced by a more upmarket affair, and being a noob I made a mistake once it arrived... I put in the supplied direct lung coil, this was of course a complete revelation and I haven't touched a cigarette since. Oh and I no longer spend the first five minutes of every day having a coughing fit either.
Join the discussion
Hellvape Fat Rabbit Solo 2 RTA
Hellvape are flying the flag for the rebuildable vapers with their latest addition, the Hellvape Fat Rabbit Solo 2 RTA
Hellvape Dead Rabbit MTL 2 RTA
Hellvape are still flying the flag for traditional rebuildable vapers, and Antony got his hands on the latest Dead Rabbit MTL 2 RTA
Hellvape Dead Rabbit 3 RTA 2024 Edition
Hellvape are flying the flag for rebuildable vape gear with the newly released Dead Rabbit 3 RTA 2024 Edition




-listing400.jpg)


